
Daniel Garcia
From localhost to mobile: testing websites with Wi-Fi or Cloudflare Tunnel
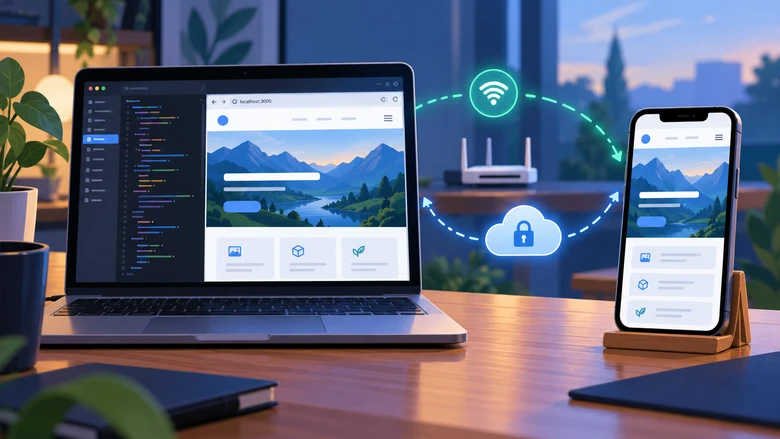
Versão portuguesa →Shrinking the browser window helps, but some problems only appear when we use a website on a phone. With the same Wi-Fi network or a temporary tunnel, we can test the project on a real device and share it with someone who can help us try it out.
In this article
When we are building a website, there comes a point where we want to pick up a phone and try it properly. We want to see whether the design works on a small screen, whether the buttons are easy to tap, whether the menu opens well, and whether we can fill in a form without friction.
Shrinking the browser window helps, but there are things we only notice with the phone in hand. The keyboard takes up part of the screen, fingers need room to tap, and an element that looked well placed on the computer may become awkward during real use.
To test a website on a phone, we do not need to turn the project into an Android app, build an APK or set up an emulator. We simply need to make the development server reachable from the phone’s browser.
And the test can involve other people as well. A colleague, friend or client can open the site on their own phone and spot difficulties that we miss after spending hours looking at the same screen.
We can do this in two very simple ways: over the same Wi-Fi network or through a tunnel, when we want to test over mobile data or share the project with someone in another location. In this article we will try both.
Why is opening the same address not enough?
On the computer, the site may be available at http://localhost:5173 or http://localhost:8000.
The important detail is that localhost points to the device on which we are using that address. On the computer, it points to the computer. On the phone, it points to the phone itself.
So we need an address that allows the phone to reach the site that is running on the computer. A tunnel solves that connection: we receive an HTTPS address that we can open in the phone’s browser, and the requests are forwarded to our local server.
What do we need to use Cloudflare?
The computer needs to have the site running and the cloudflared program available. On the phone, we only need a browser and Internet access.
This method allows us to test the site in the phone’s browser without installing Android Studio, configuring emulators or creating an APK. With the site running on the computer, we simply add the cloudflared tool, which establishes the tunnel. If it is not installed yet, we can get it from the official downloads page. It is a command-line tool and does not require setting up an Android environment.
The mode we are going to use is called Quick Tunnel. It creates a temporary address under trycloudflare.com and does not require a Cloudflare account or our own domain. It is intended for development testing and should not be used in production.
Another advantage is that it does not require opening inbound ports on the computer or setting up port forwarding on the router. cloudflared creates an outbound connection to Cloudflare, which forwards requests to our local server.
By default, anyone who knows the Quick Tunnel address can open the site. We can now also restrict access by email, making the visitor receive a temporary code before entering. We will look at that option later.
Cloudflare’s documentation describes how Quick Tunnels work and their limitations.
React with Vite: step by step
In a Vite project there is one extra detail: the server validates the hostname used in the request. Because a Quick Tunnel creates a trycloudflare.com address, we need to allow that hostname.
The safest option is to allow only the specific hostname created for that session, instead of allowing all subdomains of trycloudflare.com.
1. Start Vite
In the project folder, open a terminal and run:
npm run devConfirm the port shown. In a Vite project it is often 5173.
2. Create the Quick Tunnel
In a second terminal:
cloudflared tunnel --url http://localhost:5173Adjust the port if Vite is using a different one.
Cloudflare will show an address similar to:
https://random-example.trycloudflare.comThe hostname changes whenever we create a new Quick Tunnel.
3. Allow the hostname in Vite
Copy only the generated hostname, without https://, and add it to vite.config.ts or vite.config.js, inside the existing configuration:
server: {
  allowedHosts: ['random-example.trycloudflare.com'],
}
If a server block already exists, simply add allowedHosts to it and keep the other options.
After saving the file, restart Vite:
Ctrl+C
npm run dev
The tunnel can remain open while we restart the local server.
We could use
.trycloudflare.comto accept any subdomain under that domain, but Vite itself recommends allowing explicit hosts whenever possible. Because we do not control thetrycloudflare.comdomain, I prefer the more restrictive option, even if it means updating the hostname whenever we create a new Quick Tunnel.
Vite’s documentation explains this validation and warns against configurations that are too permissive.
4. Open it on the phone and test
Open the HTTPS address provided by Cloudflare in the phone’s browser.
Access can be through Wi-Fi or mobile data. While we are testing, the computer, Vite and cloudflared all need to remain running. When we stop the cloudflared process, that address stops working.
We can continue editing files on the computer. After saving a change, Vite still handles development as usual; on the phone we can refresh the page whenever necessary.
Sharing the test with other people
One approach I use is sending the tunnel address through WhatsApp in a one-to-one conversation with the person who is going to test. It is quick: I copy the link shown in the terminal, send it, and the person opens the site in the phone’s browser. They do not need to install an app or be connected to my Wi-Fi network.
We can ask them to complete a specific task, such as finding a piece of information or filling in a form, and tell us where they hesitated. That helps us assess design, tap targets and navigation on other screens and with other usage habits.
Sending the link in a one-to-one chat lets us choose who we share it with, but a public Quick Tunnel is not technically restricted to that person. Anyone with the address can open it.
If we want to restrict access to a specific email address, we can start the tunnel like this:
cloudflared tunnel --url http://localhost:5173 --allowed-mail person@example.comThe visitor enters the email address and receives a one-time code. They do not need a Cloudflare account.
For multiple recipients we can repeat --allowed-mail or provide a list. This feature requires a recent version of cloudflared.
When the test is over, stop the tunnel with Ctrl+C in the relevant terminal.
HTML, CSS and JavaScript: using Python to serve the site
With a site built with HTML, CSS and JavaScript, we first need to make the files available through an HTTP server. If Python is already installed, we can do that with a single command.
1. Open a terminal in the site folder
Choose the folder that contains index.html and the other site files. Then run:
python -m http.server 8000 --bind 127.0.0.1Python will start serving the files in that folder. Open http://127.0.0.1:8000 on the computer to confirm that the page, styles and scripts all load correctly.
2. Connect the tunnel to the Python server
In a second terminal, run:
cloudflared tunnel --url http://127.0.0.1:8000Copy the HTTPS address shown and open it on the phone. Keep both terminals running during the test.
In this case there is no Vite configuration to change. Python serves the files and Cloudflare creates access to them. After editing and saving the files, refresh the page on the phone to see the changes.
This simple server is suitable for testing static files; it does not run PHP and is not a replacement for a production server. Python’s own documentation warns that http.server only implements basic security checks. Python’s documentation describes the command and the available options.
What if I am already using another server?
We can use the server we already have. For example, if the site is open with Live Server on port 5500, the tunnel command will be:
cloudflared tunnel --url http://localhost:5500The port must match the one shown in the site address. The tunnel connects to the server; it does not matter whether the site was built in React or just with HTML, CSS and JavaScript.
A simpler alternative: the same Wi-Fi network
If the computer and the phone are on the same Wi-Fi network, we can open the site using the computer’s IP address. This is often the first choice when we want to test on our own phone without installing an extra tunnelling tool.
In a Vite project
Start the server with:
npm run dev -- --host 0.0.0.0On the phone, open the Network address shown by Vite. It may look something like http://192.168.1.75:5173, but we should use the address shown in our own terminal.
In an HTML site served with Python
Start the server with network access:
python -m http.server 8000 --bind 0.0.0.0Then open the computer’s IP followed by the port on the phone, for example http://192.168.1.75:8000. On Windows, we can check the IP with ipconfig, looking for the IPv4 address of the Wi-Fi connection.
0.0.0.0 is a listening option for the server, not the address to type on the phone. The firewall must allow the connection on that network, and some Wi-Fi networks block communication between devices.
This approach uses tools we may already have available: Vite in a React project or Python, if it is installed. The access works only within the local network. To open the site over mobile data or share it with someone in another place, a tunnel is more suitable.
Before sharing: we are exposing our development server
A public tunnel makes the local service accessible from the Internet. That is exactly what we want for testing — but it is worth remembering the other side of the coin.
Before sharing the address:
- confirm that no unprotected admin pages are exposed;
- avoid exposing real data or sensitive information;
- do not leave credentials or secrets visible in the interface;
- use email-based access control when the test should be limited to certain people;
- stop the tunnel once the test is finished.
A Quick Tunnel is a development tool, not a substitute for publishing an application in production.
What if we want to keep the same address?
For more frequent access, we can create a managed tunnel in the Cloudflare dashboard and associate it with our own domain. This path involves an account, a domain configured in Cloudflare and connecting cloudflared to that tunnel.
Quick Tunnels do not guarantee availability, have their own limits and their hostname changes whenever the process is restarted. They are excellent for quick tests; for a stable address and continued use, it makes more sense to move to a managed tunnel.
Cloudflare’s official guide to creating a tunnel through the dashboard explains the steps. It is a good option when we want to reuse the same address; the computer and the local server still need to remain running.
Other methods we can also use
There are other tools we can use to obtain a public address. It is worth choosing based on what is already installed and the kind of testing we want to do.
Localtunnel: if we already have Node.js and npm, we can run:
npx localtunnel --port 8000The command gives us a public address for the server on that port. npx may download the package the first time it runs, so it does not mean there will be no downloads at all. The examples are in the official repository.
ngrok: after installing the tool and setting up the account and token, we can use:
ngrok http 8000It also provides access to the local server and includes tools for inspecting requests. The setup is described in the official quickstart, and inspection features are covered in the service overview. It can be useful when, besides viewing the site, we also want to analyse the communications with the server.
Publishing a test version: services such as GitHub Pages allow us to publish static sites. The site remains available with the computer turned off, but changes need to be published again. For React, we publish the files generated by the build, with the proper hosting configuration.
| What we want to do | A method to consider |
|---|---|
| Test on our own phone on the same network | Use the computer’s IP address |
| Test over mobile data or send a link to other people, for example via WhatsApp | Cloudflare Quick Tunnel |
| Create a tunnel using Node.js and npm | Localtunnel |
| Create a tunnel and inspect requests | ngrok |
| Keep a static version available with the computer turned off | Publish to hosting such as GitHub Pages |
The test that actually matters
Being able to open the page is only the first step. After that, it is worth using the site the way a real person would:
- Open and close menus with a finger.
- Try the buttons, especially those that sit close together.
- Fill in forms and watch how much space the keyboard takes up.
- Scroll through long pages and check whether any element gets in the way of navigation.
- Rotate the phone and see how the design adapts.
- Complete a task from start to finish.
This is where the small details show up: a button that is hard to tap, a field hidden by the keyboard, or a menu that takes up too much space. These are things we can still fix while the site is in development — which is exactly when they are cheapest to fix.
We do not need to set up a full mobile environment to begin testing a site on a phone. If both devices are on the same network, the local IP may be enough. If we want to use mobile data or hand a link to someone else, a Quick Tunnel solves the problem in a couple of minutes.
In the end, the tool is the least important part. What matters is stepping away from the comfortable computer screen and seeing how the site behaves where it will probably be used: in someone’s hand.
Supporting documentation
- Cloudflare: Quick Tunnels
- Cloudflare: protecting Quick Tunnels by email
- Cloudflare: how outbound tunnel connections work
- Cloudflare: create a managed tunnel from the dashboard
- Cloudflare: preview local projects
- Vite: server options and allowed hosts
- Vite: development server CLI
- Python: HTTP server from the command line